Tutorial: Dreamweaver Site Setup
The goal of this project is to set up a new network computer with your preferences and access to your work.
FOLLOW THIS PROCEDURE CAREFULLY SO YOU DON'T LOSE ALL YOUR WORK!
Redefine your site:
- Log onto your new computer
- Open Dreamweaver
- If asked if you want to register your software, choose Don't Ask Again
- If you see the Default Editor dialog box, click OK to use the defaults
- Click the Site menu
- Choose New Site....
- The Site Setupdialog box that looks like the one below opens. There are only a few things you need to set in this dialog box, and they are indicated below with red arrows:
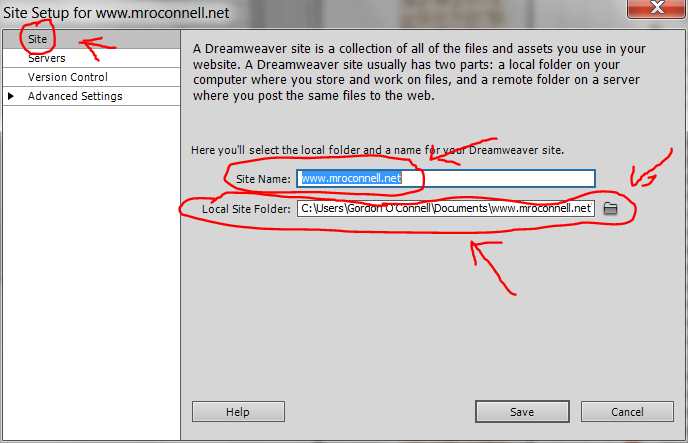
- In the box next to Site Name:, type the name of your site. Use exactly the same name you used for your root folder.
- Example: lastname_firstname_personal_website
- Click the browse icon to the right of Local Root Folder:
- Navigate to your network folder, and double click the root folder of your site. Confirm that it appears next to the word Select: at the top of the dialog box, as indicated by the upper red arrow below.
- Click the Select button at the bottom of the dialog box, as indicated by the lower red arrow below.
- Click Advanced Settings on the left hand side
- Click the browse icon to the right of Default Image Folder
- Double click your image folder
- Click Select Folder
- Click Save
- Click Done
- Click Okay in the Site Setup dialog box.
- The Manage Sites dialog box opens. Click Done. Wait while the Site Cache is generated.
- Your Site Setup is now complete.
|